There’s nothing quite like the confidence boost of a fresh set of acrylics, but let’s be real… the price tag can be a total buzzkill. As a fellow nail enthusiast and budget-conscious beauty lover, I’ve discovered some genius ways to rock stunning artificial nails without breaking the bank. Here I’ll share money-saving secrets that’ll keep your nails and your wallet looking fabulous!
Understanding the Acrylic Nail Craze
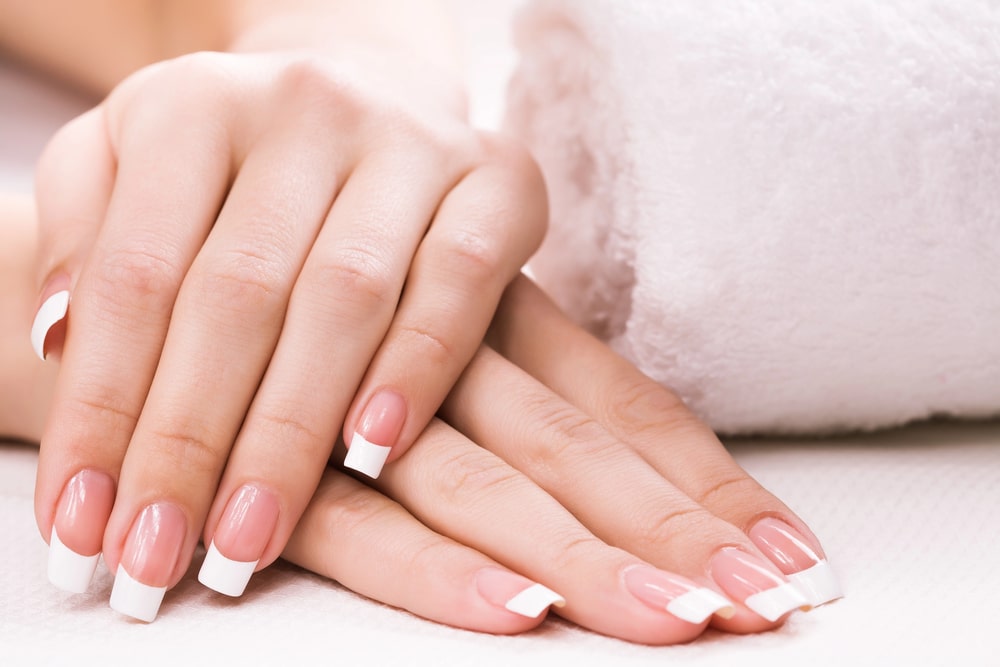
Before we jump into the money-saving tips, let’s take a quick moment to appreciate why acrylic nails are so darn popular. I mean, who doesn’t love a set of long, strong, and oh-so-glamorous nails?
Acrylic nails are a type of artificial nail enhancement that combines a liquid monomer and a powder polymer to create a hard, protective layer over your natural nails. They’re incredibly versatile, allowing you to achieve any length, shape, or design your heart desires. From classic French tips to wild and crazy nail art, acrylics can do it all!

But here’s the thing… all that fabulousness comes at a price. So, how much do acrylic nails cost? Professional acrylic sets can range anywhere from $50 to $150 or more, depending on where you live and the complexity of the design.
That’s a lot of moolah to shell out every few weeks, especially if you’re trying to stick to a budget. So, let’s explore some wallet-friendly ways to get those gorgeous acrylics you crave!
1. DIY Acrylic Nails
Okay, I know what you’re thinking… “DIY acrylic nails? Is that even possible?” Well, my friend, not only is it possible, but it can also be a total game-changer for your nail game AND your bank account!
Getting Started with DIY Acrylics
First things first, you’ll need to invest in a good quality acrylic nail kit. Look for one that includes:
- Acrylic powder
- Liquid monomer
- Nail forms or tips
- A brush for application
- Nail file and buffer
- Primer and top coat
Yes, there’s an initial investment, but trust me, it’ll pay off in the long run. Once you have your kit, it’s time to learn the ropes. Here are some tips to get you started:
- Practice, practice, practice! Don’t expect perfection on your first try. Start with a few practice nails before tackling your whole set.
- Watch tutorials: There are TONS of amazing YouTube videos out there that can guide you through the process step-by-step.
- Take your time: Rushing through the application can lead to messy results. Put on your favorite playlist and make it a relaxing self-care session!
- Start simple: Begin with basic shapes and solid colors before attempting more complex designs.
The Pros of DIY Acrylics
- Major cost savings: Once you’ve got your kit, each set will cost you just a fraction of what you’d pay at a salon.
- Convenience: No more scheduling appointments or waiting at the salon. You can do your nails anytime, anywhere!
- Customization: Want to try a crazy new design at 2 AM? Go for it! The sky’s the limit when you’re your own nail tech.
The Cons (Because Let’s Be Real…)
- Learning curve: It takes time and practice to master the technique.
- Time-consuming: Especially when you’re starting out, DIY acrylics can take longer than a salon visit.
- Potential mess: Acrylic can be… well, messy. Make sure to protect your workspace!
2. Nail School Salons
Here’s a little-known secret that’ll make both your nails and your wallet happy: nail school salons! These hidden gems offer services performed by students who are learning the trade, supervised by experienced instructors.
Why Nail Schools Rock
- Seriously discounted prices: We’re talking sometimes up to 50% off regular salon prices!
- Fresh techniques: Students are learning the latest trends and techniques, so you might even get a more up-to-date style than at some established salons.
- Attention to detail: Because they’re still learning, students often take extra care with each step of the process.
Things to Keep in Mind
- Longer appointment times: Since students are still learning, services may take longer than at a regular salon.
- Limited availability: Nail school salons often have more restricted hours than traditional salons.
- Varying skill levels: While instructors supervise, remember that the students are still learning. Be patient and communicate clearly about what you want.
3. Acrylic Dipping Powder
If the idea of working with liquid monomer and powder seems a bit daunting, let me introduce you to your new best friend: acrylic dipping powder! This innovative technique offers a more user-friendly approach to achieving that acrylic look at home.
How Dipping Powder Works
- Apply a base coat to your nails
- Dip your nails into the colored powder
- Tap off the excess and repeat for full coverage
- Apply a top coat and voila!
Why You’ll Love Dipping Powder
- Easier application: No mixing or brush skills required!
- Durable results: Dip powder manicures can last up to 3-4 weeks.
- Odor-free: Unlike traditional acrylics, there’s no strong smell.
- Tons of color options: From classic nudes to bold glitters, the choices are endless. And let’s not forget about that trendy champagne color nail polish that’s been all over Instagram lately – it looks AMAZING with the dip powder technique!
The Drawbacks
- Limited shaping: You can’t sculpt dip powder like traditional acrylics.
- Removal process: It can be a bit more time-consuming to remove than regular nail polish.
4. Coupon Clipping and Deal Hunting
Okay, so maybe DIY isn’t your thing. No worries! There are still ways to save on professional acrylic services. It’s time to embrace your inner bargain hunter!
Where to Find Nail Salon Deals
- Groupon and other deal sites: These platforms often offer discounted packages for nail services.
- Social media: Follow your favorite salons on Instagram or Facebook for special promotions.
- Loyalty programs: Many salons offer rewards or discounts for repeat customers.
- Off-peak hours: Some salons offer lower prices for appointments during less busy times.
Tips for Maximizing Your Savings
- Bundle services: Getting a mani-pedi combo is often cheaper than booking them separately.
- Bring your own polish: Some salons offer a discount if you use your own color.
- Refer a friend: Many salons offer referral bonuses.

5. Extend the Life of Your Acrylics
Whether you go DIY or pro, making your acrylic set last longer is key to saving money in the long run. Here are some tips to keep those nails looking fresh for weeks:
Maintenance Tips for Long-Lasting Acrylics
- Moisturize, moisturize, moisturize! Keep your cuticles and the skin around your nails well-hydrated to prevent lifting.
- Wear gloves: Protect your nails from water and harsh chemicals when doing household chores.
- Be gentle: Avoid using your nails as tools (no matter how tempting it is to use them to open that soda can!).
- Touch-ups at home: Learn how to do minor repairs like fixing small cracks or reattaching a loose nail.
- Regular fills: Don’t skip your fill appointments. Keeping up with maintenance prevents more costly full set replacements.
DIY Fill-Ins: A Money-Saving Skill
Learning to do your own fill-ins can be a HUGE money-saver. Here’s a quick guide:
- Gently file down the grown-out area
- Apply primer to the exposed natural nail
- Mix your acrylic and apply it to the grown-out area
- Shape and buff to blend with the existing acrylic
- Apply top coat for a fresh, glossy finish
It might take some practice, but mastering this skill can seriously extend the life of your acrylics and save you tons on salon visits.
Fabulous Nails, Happy Wallet
Whether you decide to become a DIY nail guru, hunt down the best salon deals, or master the art of making your acrylics last longer, the key is to have fun with it!
After all, your nails are a form of self-expression, and there’s nothing more beautiful than feeling confident and fabulous without the stress of overspending.
And hey, with all the money you’ll be saving, maybe you can treat yourself to that cute new set of nail polishes you’ve been eyeing… just saying!
You Might Also Like…

Look Stylish This Fall Without Spending A Fortune? Here’s How

The Secret to Creating Summer Outfits And Outfit Ideas You’ll Actually Love Wearing
Transform Your Long Skirts From Frumpy to Fabulous With These Styling Tips!
How To Look Chic In Ballet Flats? Everything You Need To Know!
How To Style Shorts Like A Pro (AND Outfit Ideas You’ll Want To Copy!)
What To Wear To Work In The Summer? (Your Guide For Every Office Dress Code)
How To Choose The Perfect Dinner Date Outfit (AND Outfit Inspo!)
9 Morning Habits Of Well Dressed Women